AI Image localization
Translate on-image text in existing sprite or UI bitmaps to another language and export a same-size image asset—also the pass for carrying store listings across many titles, locales, and platforms.
TL;DR: 3 steps
AI image localization fits large batches of sprites or UI bitmaps that already bake text into the art. When keeping copy inside the bitmap is acceptable, it is a fast i18n pass: pick a target language, run generation, and get a same-size image with the scene mostly preserved and the labels switched. It is image-generation based—not a separate text-layer export—so layout and style stay in the pixels.
AI image localization rewrites text that sits inside a bitmap via model generation, then outputs a matching-size asset. No hand-redraw of every label is required for a first pass.
The same pass covers store listings. A team carrying many titles onto App Store, Google Play, and Steam is producing the same screenshot set once per locale per store, and that count grows faster than the art does.
Step 1: Start from a source UI image
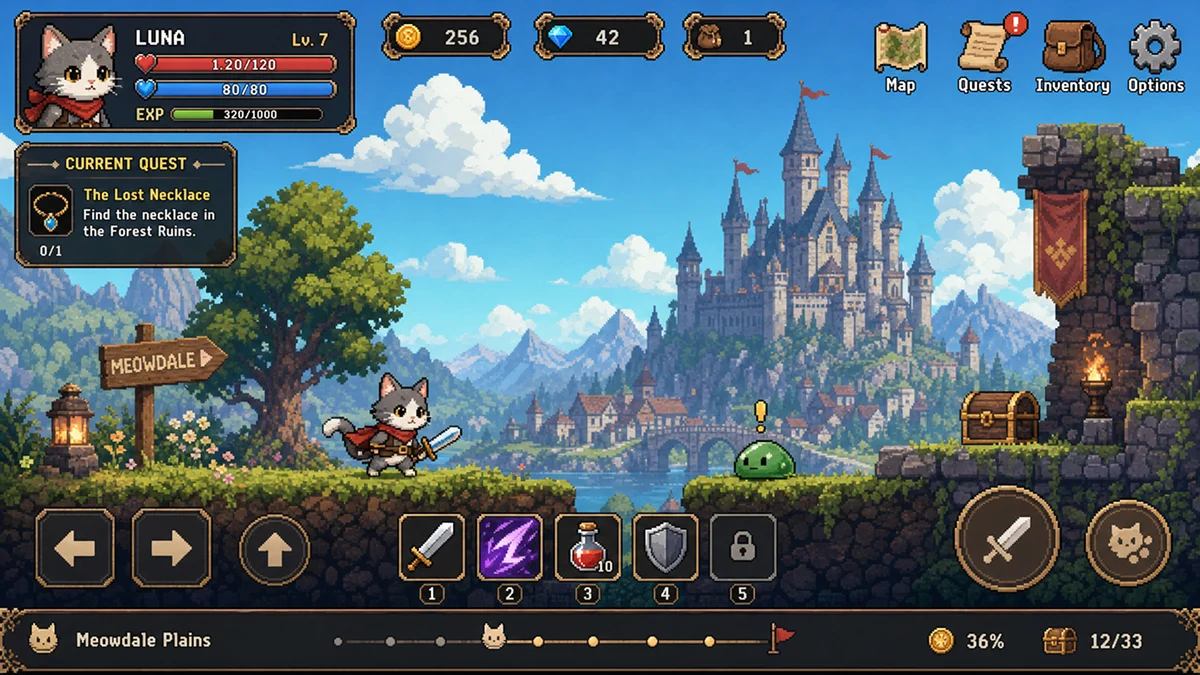
Use a game interface or scene sprite that already shows the source language. The example below is an English UI frame (location name, NPC prompts, signs, backpack / settings labels).
Step 2: Open AI image localization and set the target language
With the image selected, open AI tools, then choose AI image localization.
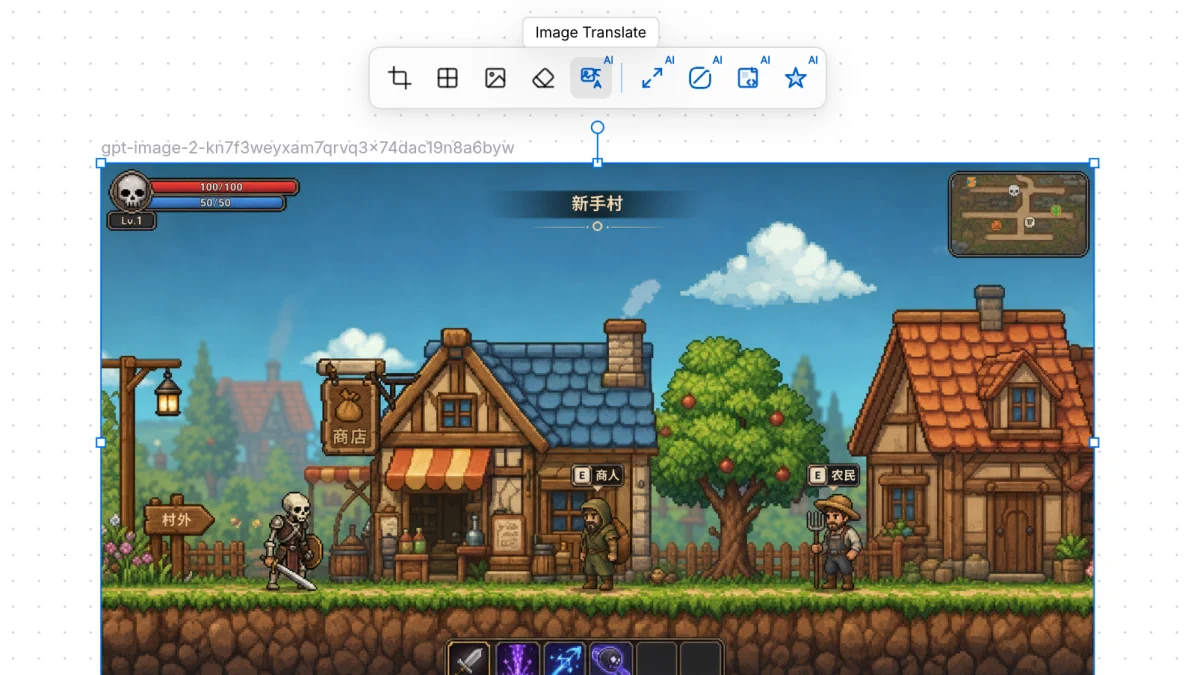
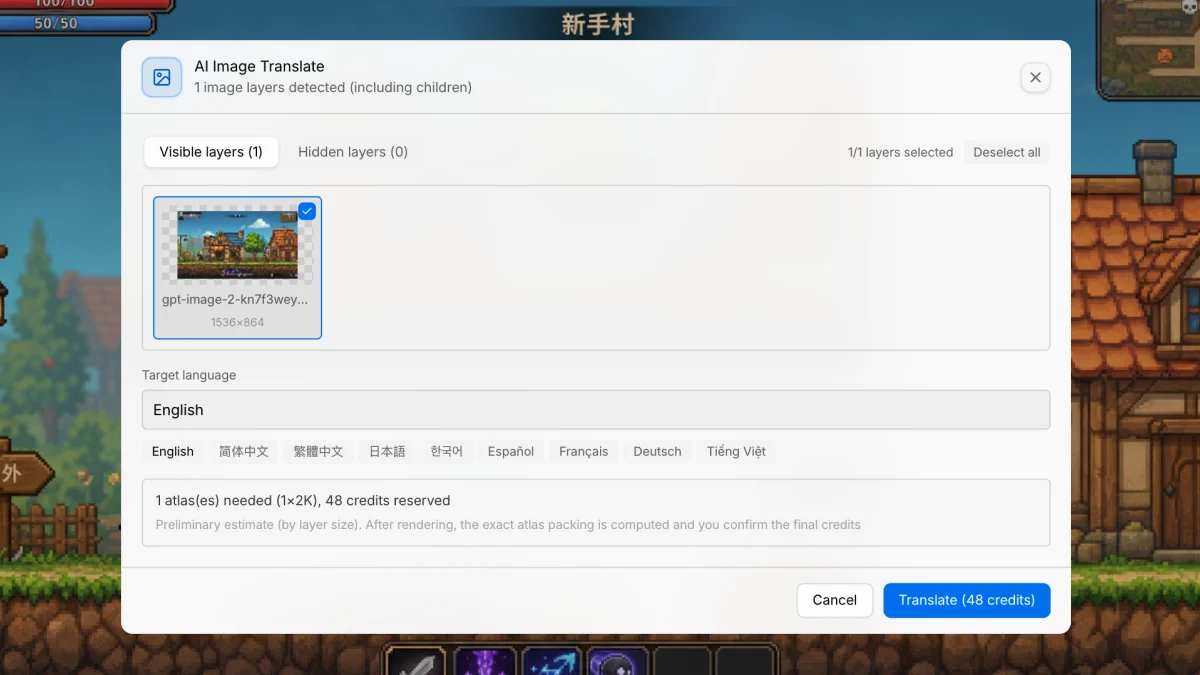
In the AI image localization dialog, choose the target language (for example Japanese), confirm the layer, then run Translate.
Step 3: Review the same-size translated image
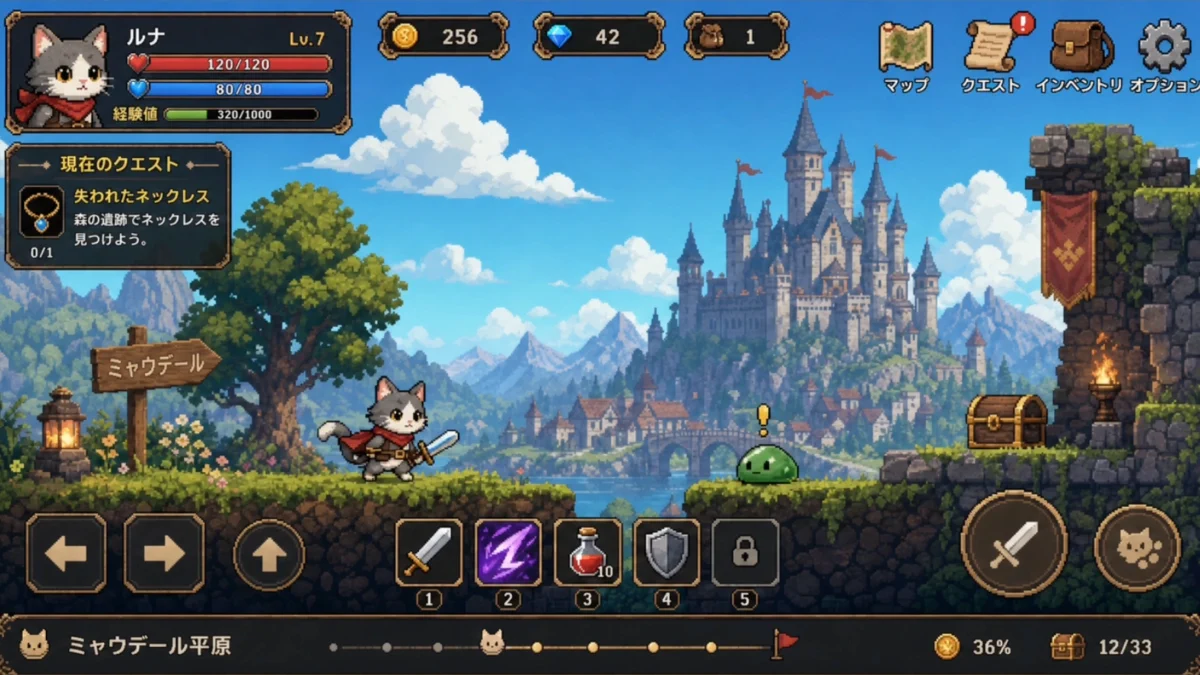
The result keeps the same dimensions as the source. On-image copy switches to the target language (location title, NPC prompts, shop / exit signs, backpack / settings, and similar labels).
Running a listing set across titles and stores
One screenshot is a single run. A portfolio on three stores in eight locales is the same run multiplied out, and the total is titles multiplied by screens multiplied by locales — a number that gets large before the art does.
What to fix before scaling the set:
- Decide source-of-truth per screen. Regenerating from the original plate each time keeps quality stable. Translating an already-translated output compounds drift.
- Keep dimensions per store. Output matches the source size, so the per-store frame sizes have to be right on the source set rather than corrected afterwards.
- Check glyph coverage early. CJK and Vietnamese diacritics are where a baked-in label breaks first. Run one screen per locale before committing the batch.
Since copy lives in the pixels, a listing change means regenerating the affected screens rather than editing a string table. Plan listing updates as a batch, on the same schedule as the seasonal art in Restyle.
Worked example on a real store frame: Tired of Localizing App Store Screenshots One by One? Batch Image Translate in VberAI Studio.