Layer Split (formerly: manual layering, then auto-cut)
Draw boxes on a selected image, then Layer Split auto-layers and AI-cuts to those sizes. Auto-Layering on the same toolbar skips the boxes.
TL;DR
Layer Split fits a selected bitmap when the cut size should follow boxes you draw. After the boxes, the pass auto-layers and AI-cuts; output names stay readable. The same toolbar control also lists Auto-Layering, which skips the boxes and cuts from detected edges. That path is written up in Auto Layering.
When objects are occluded or adjacent, a drawn box can still isolate one object—for example a building without the grass and dirt around it.
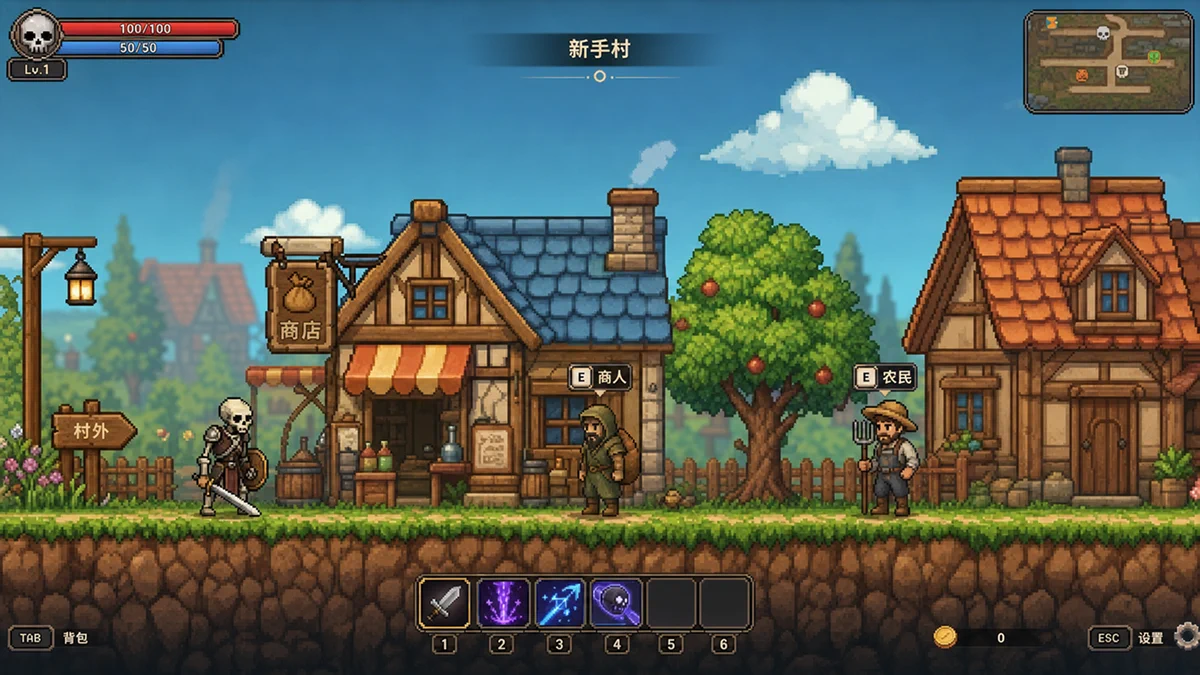
Step 1: Open Layer Split from the toolbar
Select the image on the canvas. On the selection toolbar, open the overlapping-layers control (to the right of Extract). Two same-level items sit there:
- Layer Split (from 27 credits) — draw regions by hand, then auto-layer and AI-cut. Generated size follows the boxes you drew.
- Auto-Layering (from 37 credits) — no manual boxes; the pass cuts from detected edges.
The old Extract item Manual Layering is gone. Layer Split is that workflow under the current name: manual boxes, then automated layering and cut generation.
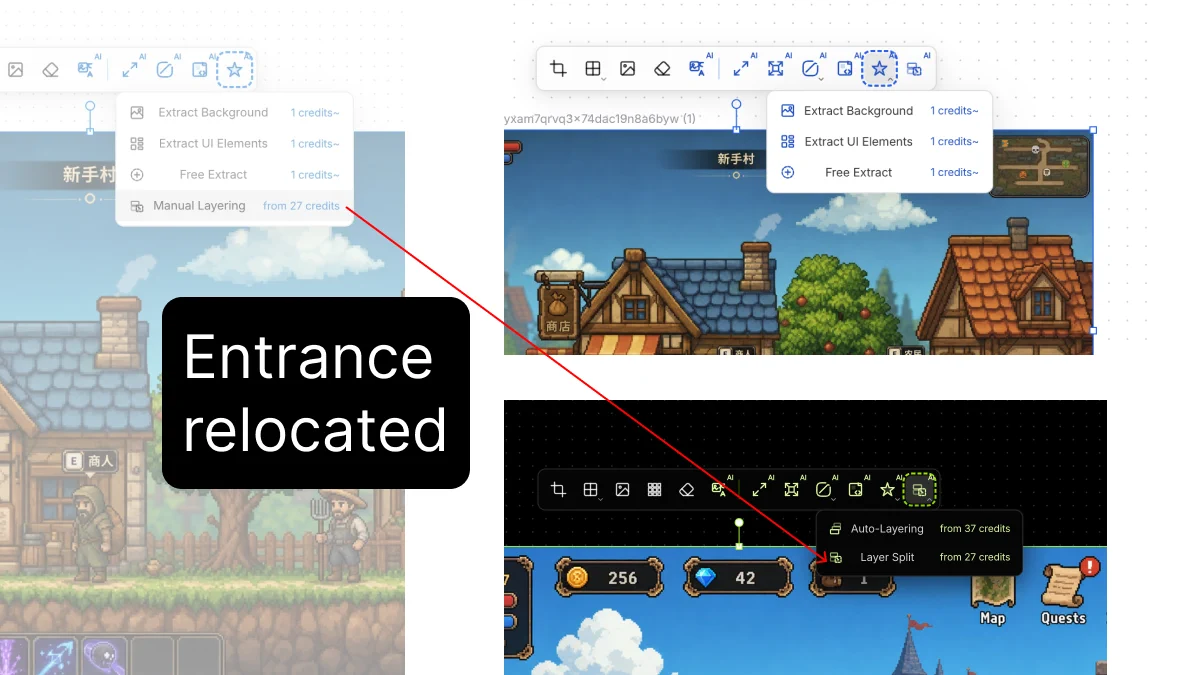
Step 2: Manually separate art layers and text layers
After Layer Split opens, select the full area that contains the target art, then label which layers are visual art and which are text. The boxes set the generate size. The art/text split allows stronger intervention in later processing.
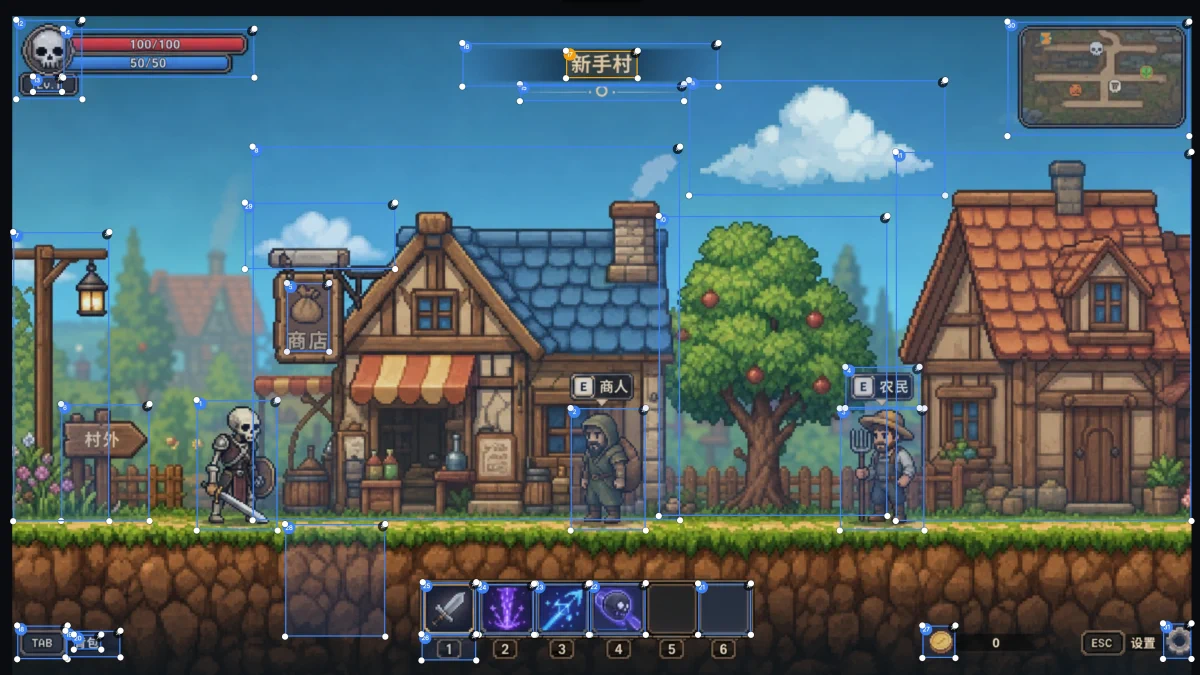
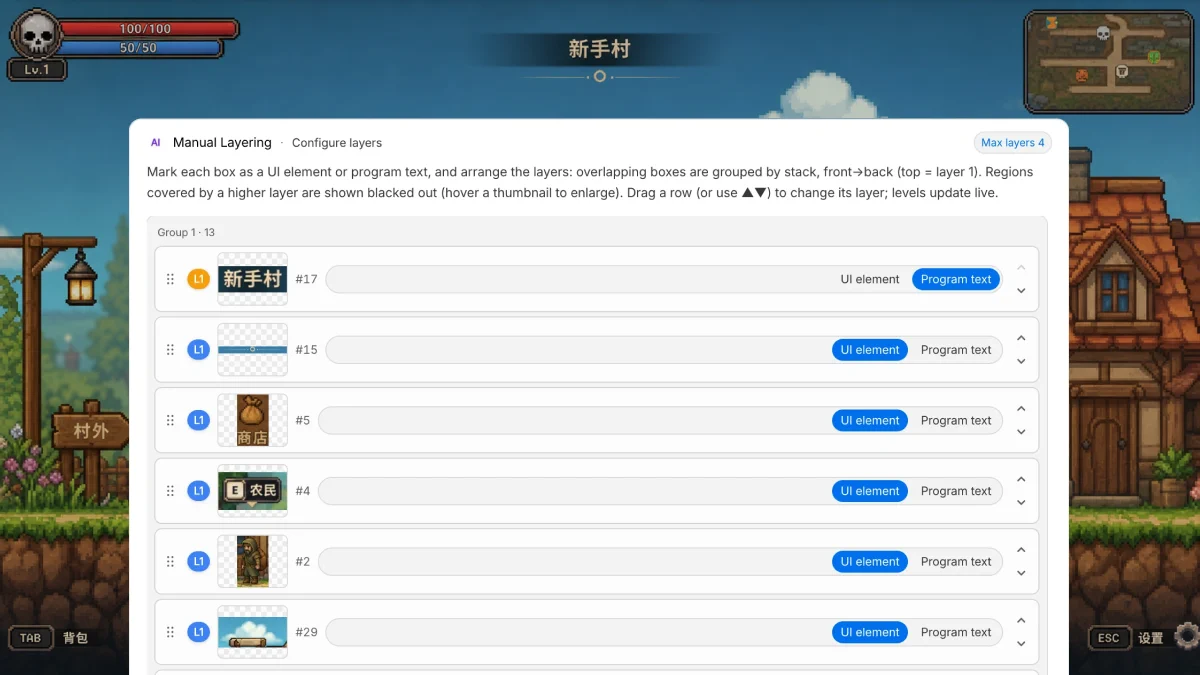
Step 3: Generate the processed result
Run generation after the boxes and layer types are confirmed. The output follows those boundary and typing rules.
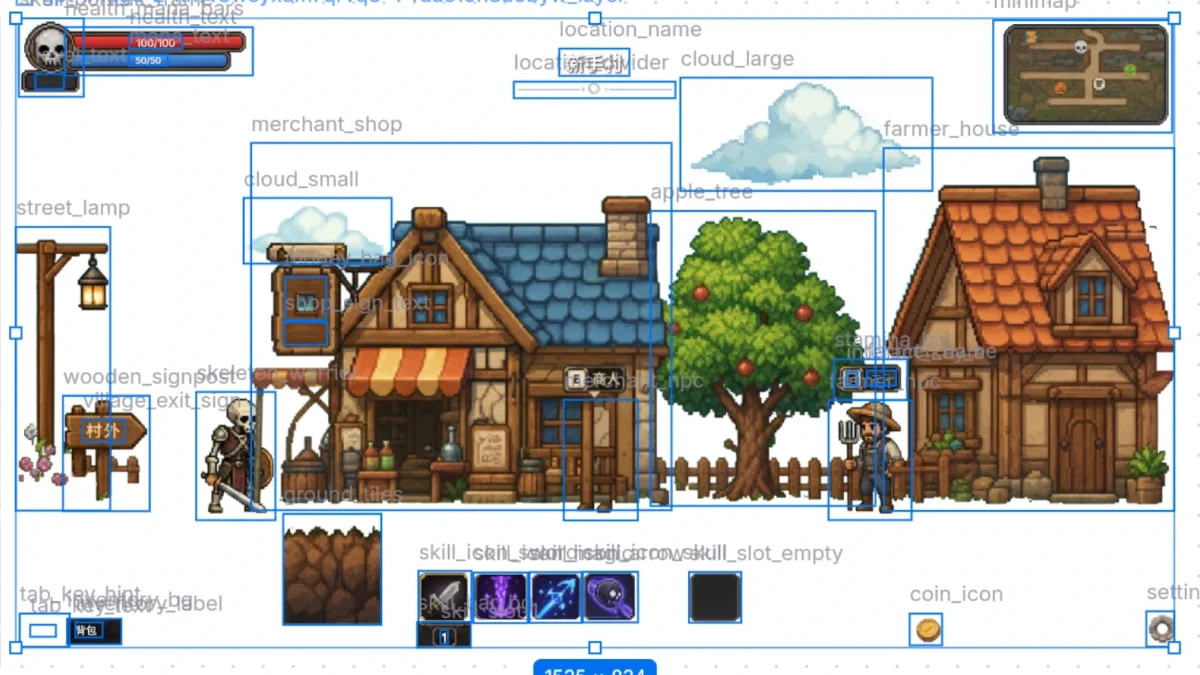
Complex scenes can still hit extra processing limits. After the run, output images receive meaningful names that map to each visual result, which makes later retrieval easier.
Walkthrough video
Layer Split on a selected board, from the toolbar through boxed cuts:
Same outcome, no boxes: Auto Layering.