Figma 到 Godot
儲存本地 .fig,用 Import Project 匯入 VberAI Studio,再匯出成 Godot 場景。
先說結論:3個步驟
Figma 到 Godot 的主要邏輯是:針對已經分層的 .fig 檔案 UI / HUD,要批次化處理好美術素材後,匯入到 Godot 中作為場景使用。VberAI Studio 用 Import Project(匯入專案) 匯入這份檔案,再匯出到 Godot。匯出得到 .tscn;預設路徑按 Godot 的 Assets 目錄來寫。
已經是分層的 Photoshop 檔案:PSD 到 Godot。
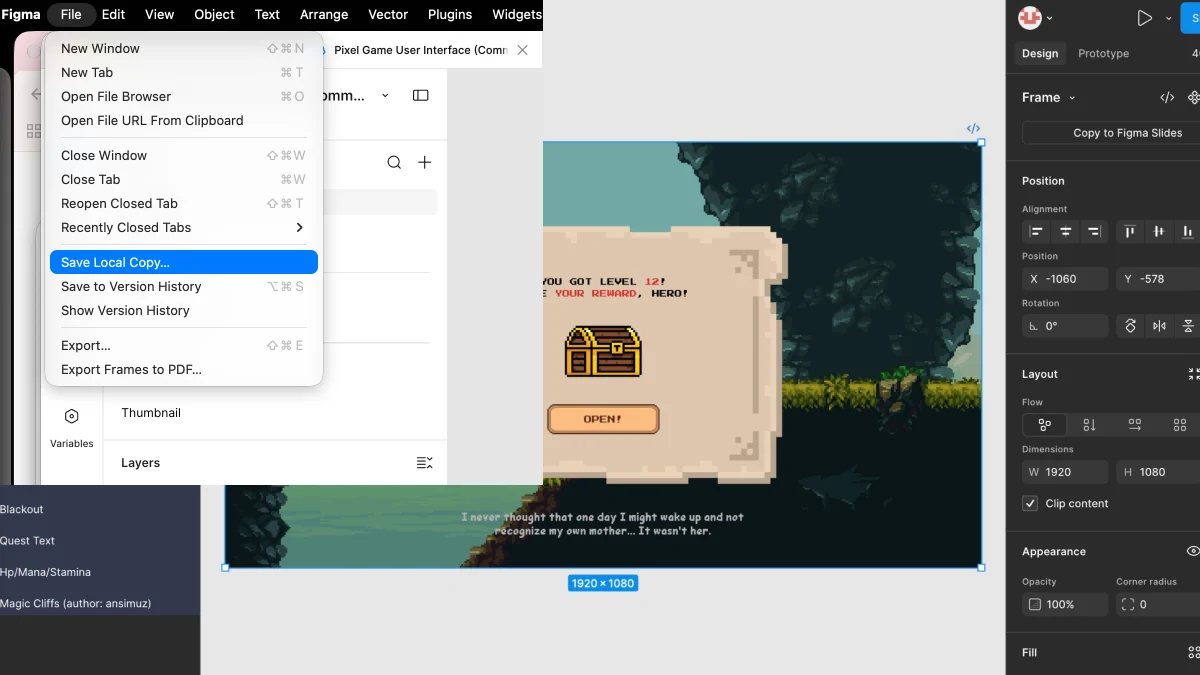
步驟 1:存一份本地 .fig
在 Figma 中開啟選單:File(檔案)→ Save Local Copy(儲存本地備份)。已經命名的編組(畫框、按鈕、HUD 條)會帶到 VberAI Studio,並進到 Godot 的節點樹裡。
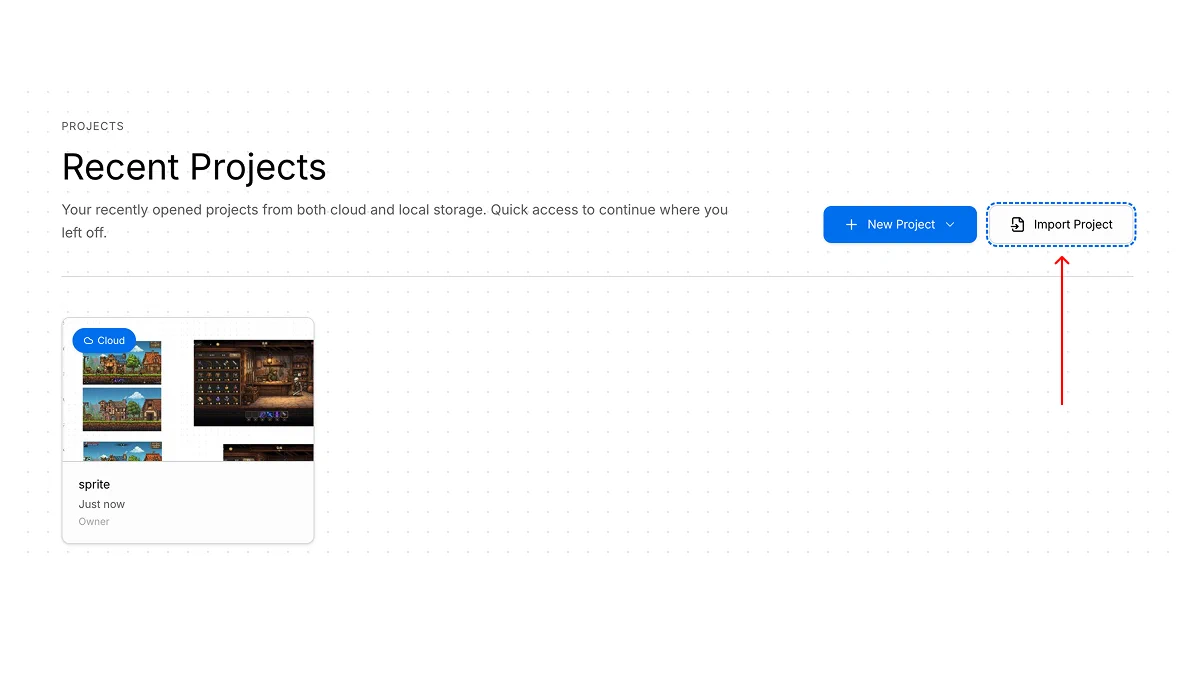
步驟 2:在 VberAI Studio 裡 Import Project
在 VberAI Studio 的專案頁,選 Import Project(匯入專案),選擇剛剛匯出的 Figma 的 .fig 檔案。
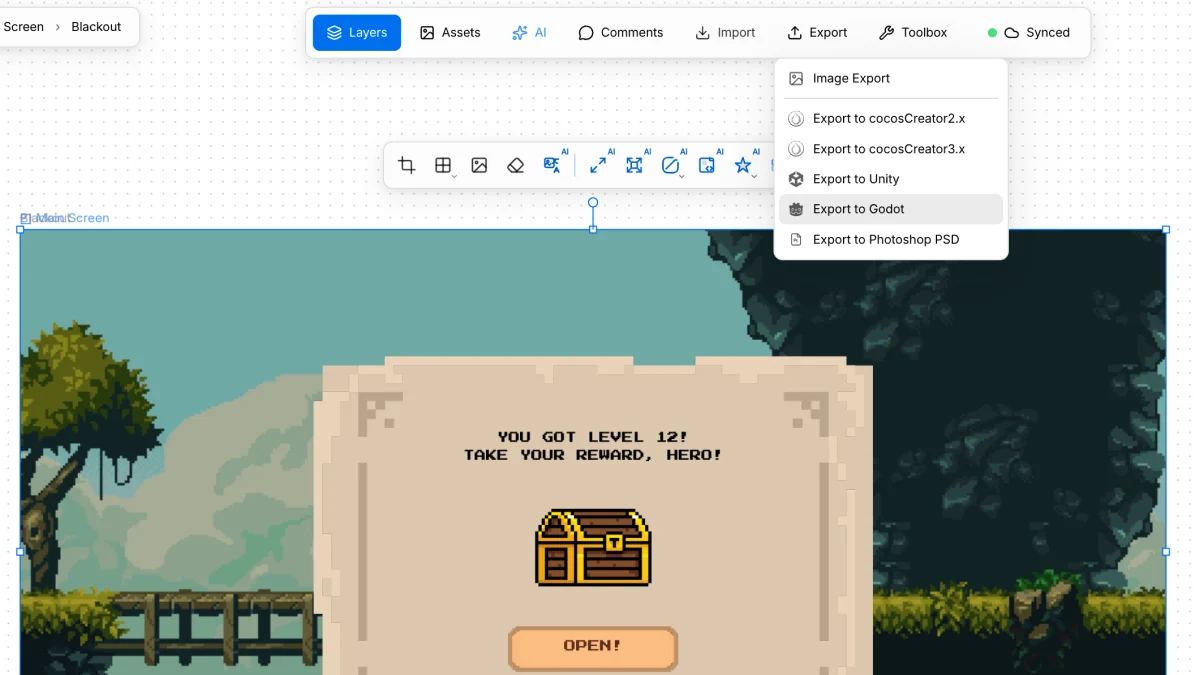
步驟 3:匯出到 Godot
選中這一屏(例如 Main Screen)。開啟 Export,選 Export to Godot。
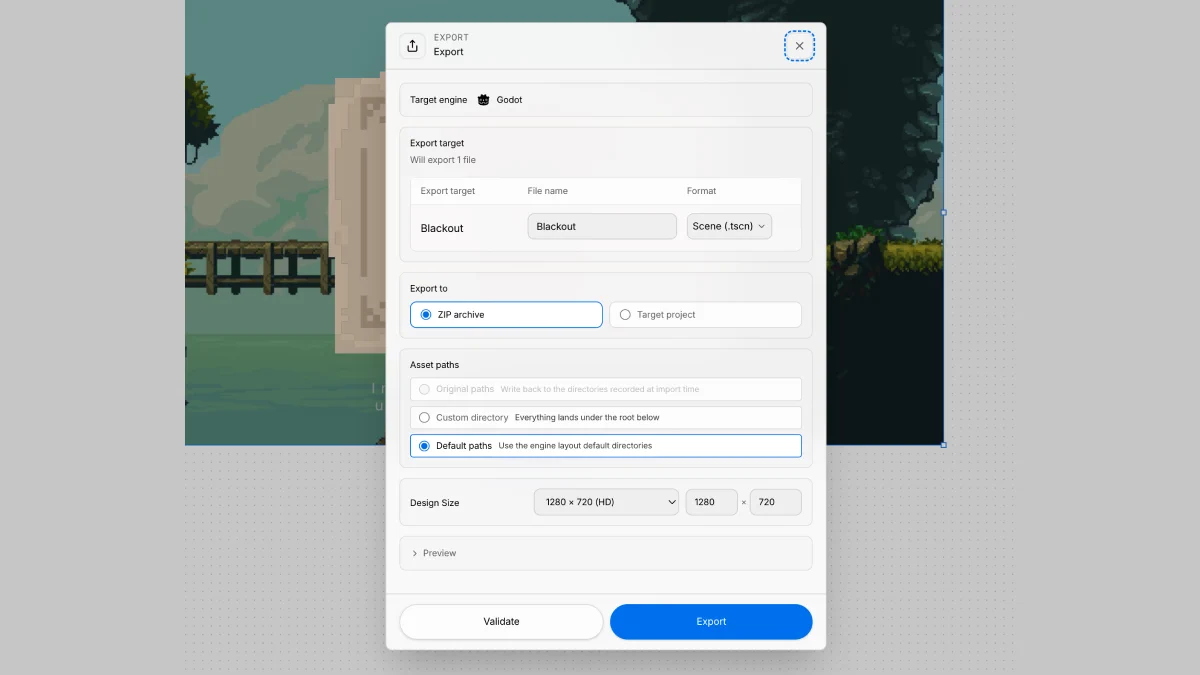
對話方塊裡把格式設成 Scene(.tscn)。Default paths 會去專案裡找 Assets 資料夾,並按這套目錄寫檔案。
演示影片
Figma Import Project,再匯出到 Godot: