Auto Layering: Image to Layers
Image to Layers: split a composite UI or scene into named, independently editable layers—no boxes to draw. Same goal as Layer Split, from detected edges.
TL;DR: 3 steps
Image to Layers on this site is Auto Layering: it splits a composite plate into independently editable layers. No boxes to draw: the pass cuts from detected edges. Same toolbar as Layer Split; same goal, boxed sizes on that page.
Why the cuts still have to carry names, positions, and interaction into an engine: Image to Layers: How to Separate Character Images Into Layers for a Faster Game Asset Preparation Workflow.
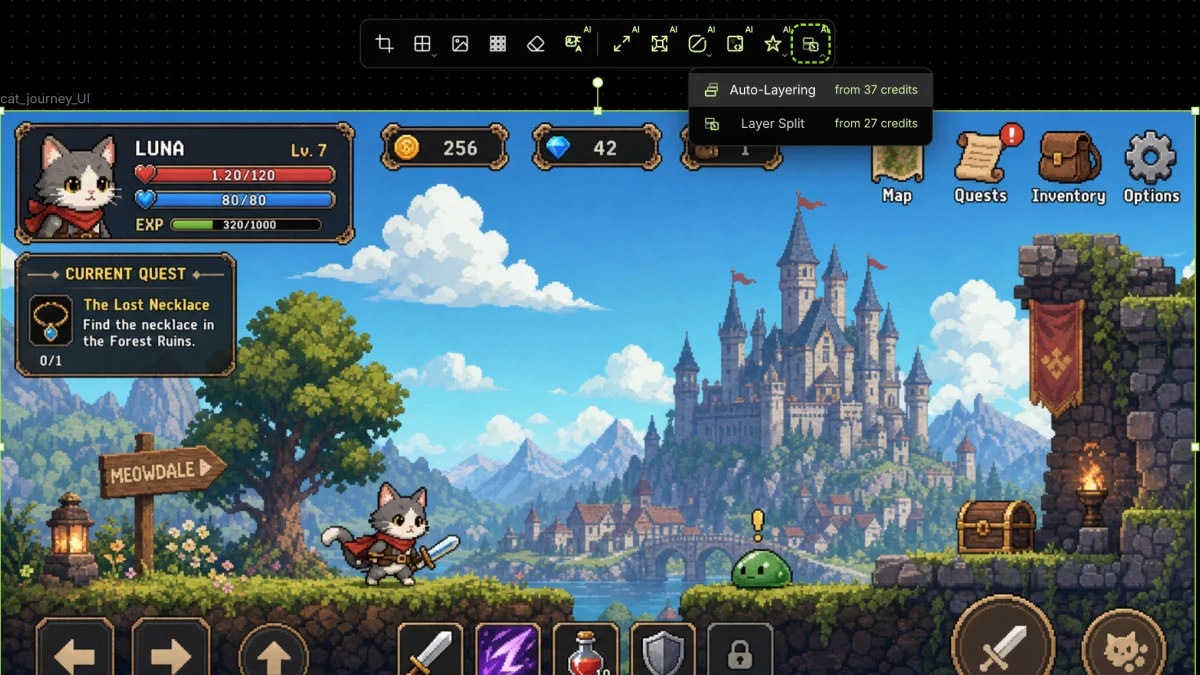
Step 1: Open Auto-Layering
Select the board (for example cat_journey_UI). Open the overlapping-layers menu and choose Auto-Layering.
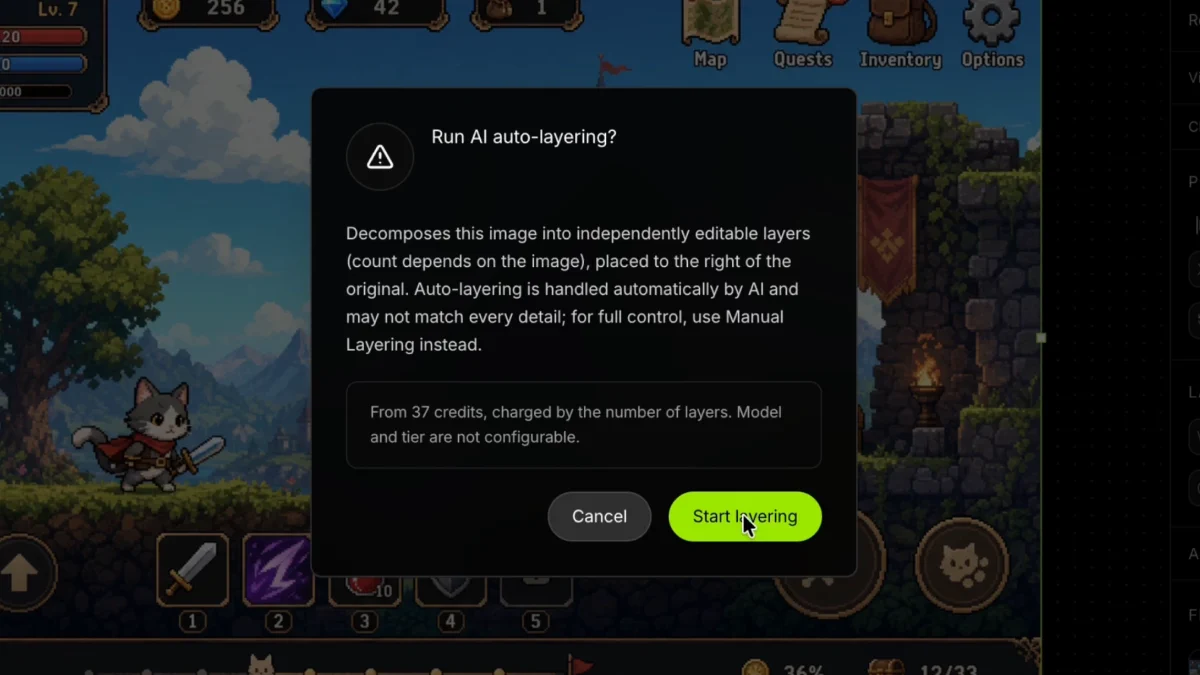
Step 2: Confirm Auto-Layering
Run AI auto-layering? then Start layering. The dialog may still say Manual Layering—that control is Layer Split.
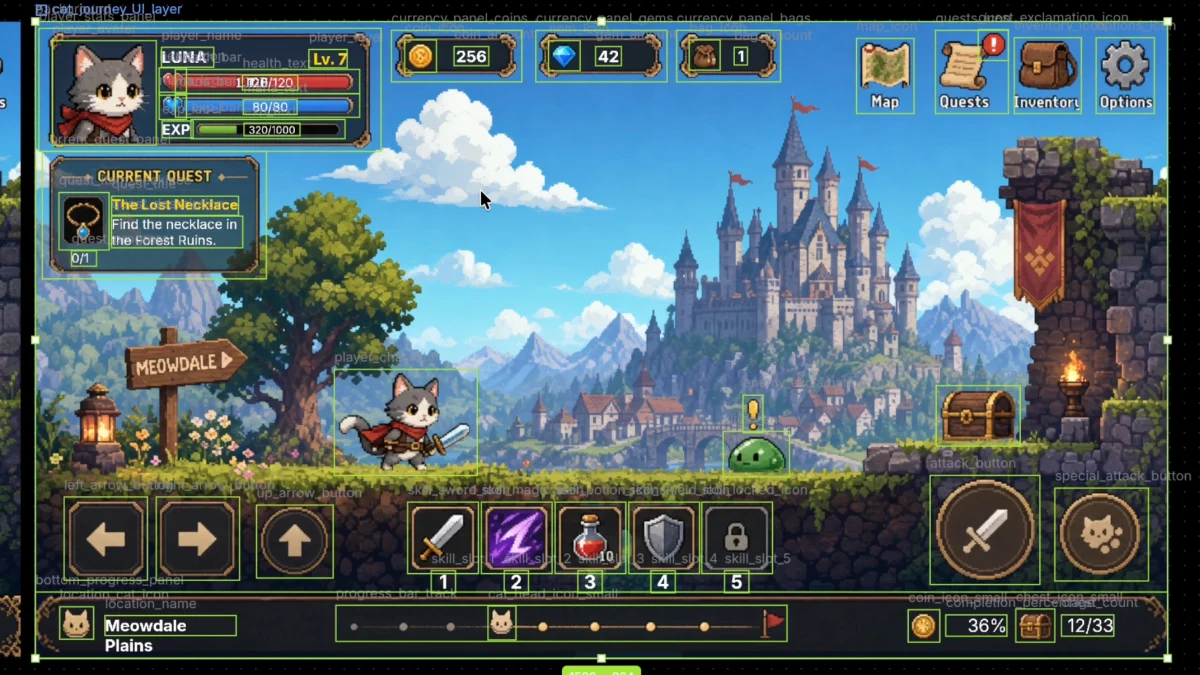
Step 3: Review named layers
Results land to the right of the source, already named. Complex HUD and scene pieces are boxed automatically.
Walkthrough video
Same goal, drawn boxes: Layer Split. After the named layers exist, PNG to PSD writes them to a Photoshop file. The same layers can go to Unity: Figma to Unity or PSD to Unity.